Posts
MDT UDI Pre-flight checks
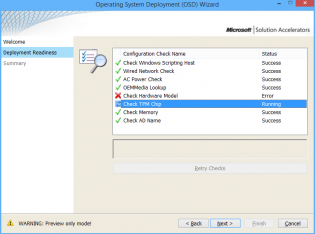
One of the best things to come out of MDT is the User Driven Interface (UDI) and the preflight page which allows custom checks. You can control whether a check passes or not with the exit code of the script. The locations to put preflight scripts is MDT Toolkit files packagetoolsArchPreflight
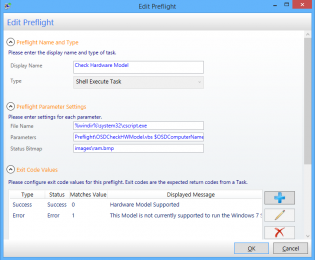
Check Hardware Model
This is a VBscript that goes through from Win32_ComputerSystem Model and exits with 0 if it finds a match.
Preflight Name and Type
Display Name: Check Hardware Model
Type: Shell Execute Task
Preflight Parameter Settings
File Name: %windir%system32cscript.exe
Parameters: PreflightOSDCheckHWModel.vbs $OSDComputerName
Status Bitmap: imagesram.bmp
Exit Code Values
| Type | Status | Matches Value | Displayed Message |
| Success | Success | 0 | Hardware Model Supported |
| Error | Error | 1 | This Model is not currently supported to run the Windows 7 SOE. |
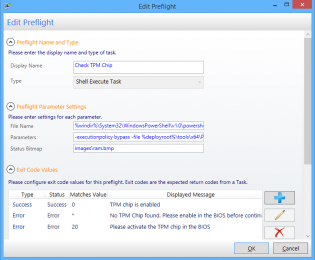
Check TPM Chip
This is a powershell script that exits 0 if it is a VM or a MAC (machines allowed to not have TPM) then checks for the existence of a TPM chip. It then checks to see if it has been activated in the BIOS.
Takes a few seconds to run, hopefully I can optimise it in the future.
Preflight Name and Type
Display Name: Check TPM Chip
Type: Shell Execute Task
Preflight Parameter Settings
File Name: %windir%System32WindowsPowerShellv1.0powershell.exe
Parameters: -executionpolicy bypass -file %deployroot%toolsx64PreflightOSDCheckTPMChipV2.ps1
Status Bitmap: imagesram.bmp
Exit Code Values
| Type | Status | Matches Value | Displayed Message |
| Success | Success | 0 | TPM chip is enabled |
| Error | Error | * | No TPM Chip found. Please enable in the BIOS before continuing |
| Error | Error | 20 | Please activate the TPM chip in the BIOS |
Check AD Name
I have a script that looks to the AD to warn if the computer name exists. There's quite a bit of work involved to get it working, will share if anyone is interested.
Setting lockscreen and wallpaper based on resolution for Windows 8.1 during OSD
Lockscreen
First you need to create and name files in this convention (we used png files and renamed them to jpg - this somehow works)
LockScreen___2160_1440.jpg
LockScreen___1024_0768.jpg
We used the top 10 resolutions on client machines and also the Surface Pro 3 resolution
1680 x 1050
1920 x 1080
1280 x 1024
1366 x 768
1024 x 768
1600 x 900
1920 x 1200
1280 x 800
2560 x 1440
1600 x 1200
2160 x 1440
Notice each number is 4 characters.
During OSD run the following commands using a package with the images in it
xcopy /s LockScreen*.* C:ProgramDataMicrosoftWindowsSystemDataS-1-5-18ReadOnlyLockScreen_Z /y
xcopy /s LockScreen*.* C:ProgramDataMicrosoftWindowsSystemDataS-1-5-18ReadOnlyLockScreen_Y /y
xcopy /s LockScreen*.* C:ProgramDataMicrosoftWindowsSystemDataS-1-5-18ReadOnlyLockScreen_X /y
The reason for copying to 3 folders is that if the resolution changes it uses the next letter (Internet told me, haven't confirmed)
Wallpaper
Create a new package separate from the lockscreen package with the files above however with a new naming convention so the script below is happy
BackgroundDefault2160x1440.jpg
BackgroundDefault1024x768.jpg
and so on.
In your unattend.xml file Under Specializeamd64_Microsoft-Windows-Shell-Setup_neutralThemes
set DesktopBackground to "C:windowsWebWallpaperHappySCCMBackgroundDefault.jpg"
changing HappySCCM to your org/theme name.
In your package add the script https://send.estate/s?e=8d2b330455d4fcb
In your task sequence have 2 run commands using the package
xcopy /s *.jpg %windir%WebWallpaperHappySCCM /y
cscript.exe SetBackground.vbs
You can also modify the last section of the code, if the resolution doesn't match it uses the BackgroundDefault1920x1080.jpg, rename that to an image that scales well.
Deploy Windows 10 Preview with SCCM 2012 R2 (Unsupported)
Johan Arwidmark and Niall Brady have posted guides on deploying Windows 10 Preview injecting the Windows 10 version of Dism during the task sequence.
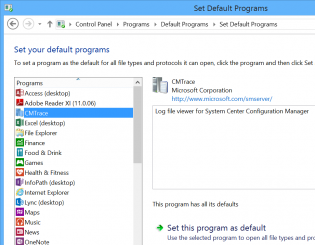
Adding custom programs to the Set Default Programs UI
Hi, today I wanted the CMTrace tool to be recognised in the Set Default Programs control panel applet. There is a bit of information on the net but it's confusing.
In the registry you can set the program, launch arguments, file types and icon. This can be used for any app by modifying the reg file.
Once added you may like to use DISM.exe to extract your chosen defaults and import during your task sequence.
Modular Task Sequence groups - Just an idea
Maik Koster has created a really good tool that monitors/ keeps backup of task sequence changes
expanding from this it may be possible to mark groups of your task sequences as modules. So say when a task sequence changes the script would then record the xml changes of that module group and replace in all task sequences where it is used. It would be perfect for the apply driver steps.
I haven't really worked it all out as I don't have many task sequences for it to be super useful and it would be a bit to hacky. I hope Microsoft can implement modules and version control in the next release of ConfigMgr.
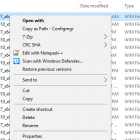
Add a Right Click Copy Folder or File path menu option in Windows Explorer
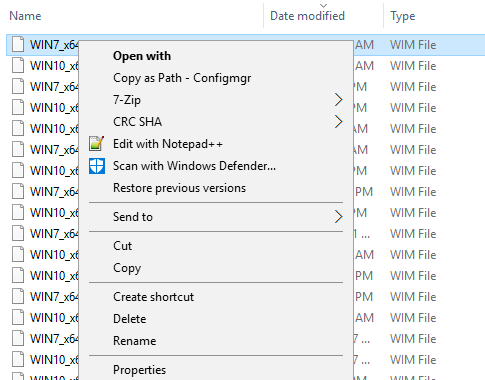
SCCM ConfigMgr doesn't like quotes around paths when adding packages or Wims, etc so the secret shh shift + right click copy as path isn't that handy.
Here's a reg file to add a special right click option for ConfigMgr
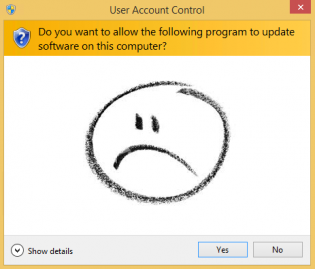
KB2918614 - UAC GATE
Update 13/11:
A new hotfix was released:
http://support.microsoft.com/kb/3008627
After install above hotfix, you can use below registry key manually as a switch to enable or disable the UAC :
Under Key “HKLMSOFTWAREPoliciesMicrosoftWindowsInstaller”, create a DWORD: “NoUACforHashMissing” and set its Value to 1.
Update 17/09:
You can whitelist existing msi's. Not tested yet, will test and deploy as a dependency for the update.
https://send.estate/s?e=8d19fef3f12531a
After further discussion with our product team. They provided us a new workaround that you can add the existing applications into a whitelist. Here is the details:
Whitelisting: If you trust the application that it is always digitally signed and does not contain any malicious payload, add it to the whitelist.
There are two REG keys needed for whitelisting:
1) Need Whitelisting: Under Key “HKLMSOFTWAREPoliciesMicrosoftWindowsInstaller”, create a DWORD: “SecureRepairPolicy” and set its Value to 2.
We (Microsoft) wrote a script to add the white list for customer automatically. Please download the attachment from https://send.estate/s?e=8d19fef3f12531a and rename it as .vbs. Double clicking it will help to add the whitelist for all of the installed MSI application.
Update on KB2918614.
Microsoft:
This security update resolves a privately disclosed vulnerability in Microsoft Windows. The vulnerability could allow elevation of privilege if an attacker runs a specially crafted application that attempts to repair a previously-installed application. An attacker must have valid logon credentials and be able to log on locally to exploit this vulnerability.
Workaround if you have problems with repairing application:
==================================================
1. Uninstall the application and reinstall it with the security update installed. (sourcehash file generated with security update)2. Manually copy the sourcehash file to c:windowsinstaller folder. As the sourcehash file is generated based on the application files, the sourcehash file generated on computer A can be used on computer B.
Another Workaround:
Not sure of the consequences fully yet - Remove
HKEY_LOCAL_MACHINESOFTWAREMicrosoftWindowsCurrentVersionInstallerUserDataS-1-5-18Products{guid}InstallPropertiesLocalPackage
This then uses Windows Installer Source list for msi repair without promtping. And generates you a fresh sourcehash.
Uninstall Commands (via SCCM Package):
Windows 7 x64 Uninstall: c:windowssysnativecmd.exe /c dism.exe /online /remove-package /PackageName:"Package_for_KB2918614~31bf3856ad364e35~amd64~~6.1.1.4" /quiet /norestart
Windows 8 x64 Uninstall: c:windowssysnativecmd.exe /c dism.exe /online /remove-package /PackageName:"Package_for_KB2918614~31bf3856ad364e35~amd64~~6.3.1.4" /quiet /norestart
Windows 2008 R2 x64 Uninstall: c:windowssysnativecmd.exe /c dism.exe /online /remove-package /PackageName:"Package_for_KB2918614~31bf3856ad364e35~amd64~~6.1.1.4" /quiet /norestart
Sysnative is required otherwise you get error 11.
Windows 7 x86 Uninstall: cmd.exe /c dism.exe /online /remove-package /PackageName:"Package_for_KB2918614~31bf3856ad364e35~x86~~6.1.1.4" /quiet /norestart
The work arounds aren't that easy when you have over a 1000 apps, the update would be ok in your base image.
Thanks to Jörgen Nilsson for discovering this via http://ccmexec.com/2014/09/kb2918614-windows-installer-triggers-uac/
Take advantage of OEM Settings to display OSD state!
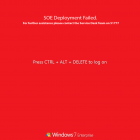
I have 2 scenarios that allows techs to determine the computers state. When the task sequence fails or when a Lab computer hasn't been added to a lab group. It's easy to enable the oembackground and rename a jpg picture. Group policy reg can disable the background picture.
For the first scenario you enable 'Continue on Error' for the very first group and have a catcher group at the end of the task sequence that runs only if TSVariable '_SMSTSLastActionSucceeded' = False. MDT Task sequences are setup like this by default. It is best if the captured wim you are deploying already has the background file in it for scenarios where it fails due to not having any network access.
In the catcher group you will need 3 steps:
1. Copy jpg: Run command line with disable 64-bit file system redirection using a package with the jpg file (Not needed if jpg is in the captured wim):
cmd.exe /c xcopy Fail-Wallpaper.jpg C:\Windows\System32\oobe\info\Backgrounds /i /y
2. Rename jpg: Run command line with disable 64-bit file system redirection
cmd /c ren C:\Windows\System32\oobe\info\Backgrounds\Fail-WallpaperMU1.jpg backgroundDefault.jpg
3. Enable OEMWallpaper: Run command line with disable 64-bit file system redirection
cmd /c reg add HKLM\Software\Microsoft\Windows\CurrentVersion\Authentication\LogonUI\Background /v OEMBackground /t REG_DWORD /d 1 /f /reg:64
I can expand and provide scripts on how I determine whether the computer is part of a lab ou/group based on name and ad object. Let me know!
Edit: This entry is for Windows 7, In Windows 8.1 you should do similiar but use the lockscreen - See the post on Windows 8.1 setting lockscreen and wallpaper for more information
SCCM USB Boot disk creator
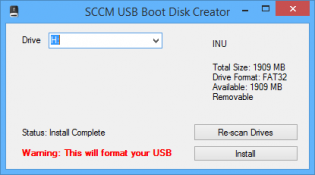
I made a little program that sets up usb drives to be bootable into OSD winpe. I made it because we are getting devices without dvd drives that can't pxe boot and our techs don't have access to create bootable usb's from the console as they need the dp cert and password.
You generate a boot iso from the console, then copy the cd contents to the source folder where the program resides.
Program and my bad source code (if anyone wants to improve it) https://send.estate/s?e=8d189f24f1c9ada[1]
Pre-Reqs:
Dot Net 3.5
A bootable iso generated from the SCCM Console
Instructions:
Copy all files from the bootable iso to the source folder that resides with the exe.
Distribute as you wish.
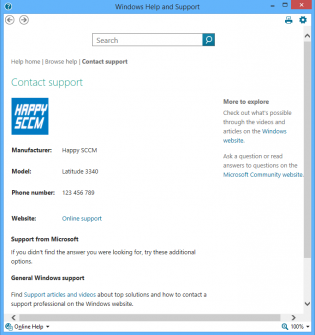
Set Computer Model OEM Information during task sequence.
Make your SOE a little bit fancy
To set the Computer Model information during OSD you just need to add a run command line step
Powershell.exe -ExecutionPolicy Bypass -Command $model = Get-WmiObject win32_computersystem model;Set-ItemProperty -Path HKLM:SoftwareMicrosoftWindowsCurrentVersionOEMInformation -Name Model -Value $model.model
Other Settings you can put in HKLMSoftwareMicrosoftWindowsCurrentVersionOEMInformation
Logo - Pathtologo.bmp
Manufacturer
SupportPhone
SupportURL

