packaging

Deploying Office 2019 VL
Office 2019 now uses click-to-run technology instead of 'setup /admin' there are a few changes, probably for the best in the long run.
Create Config Files
First you need to download to Office Deployment tool
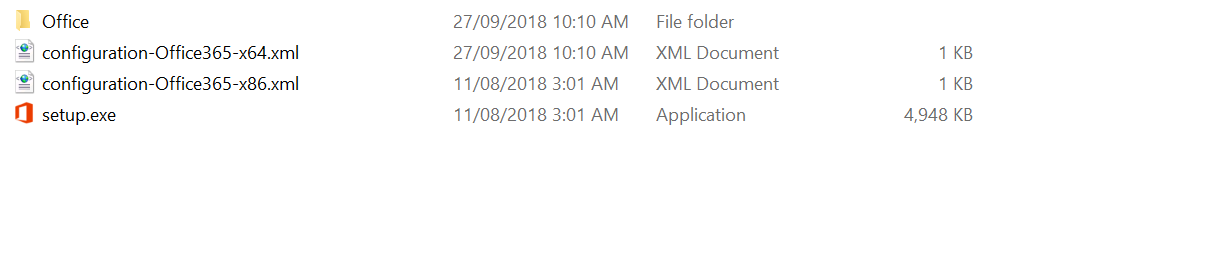
This is a self extracting file that spits out setup.exe and 2 sample config files - one for 32-bit and one for 64-bit.
Edit the edition you want to download. If you want the Volume License version change the Product ID to 'ProPlus2019Volume'
You don't need to add Visio or Project as they are also downloaded.
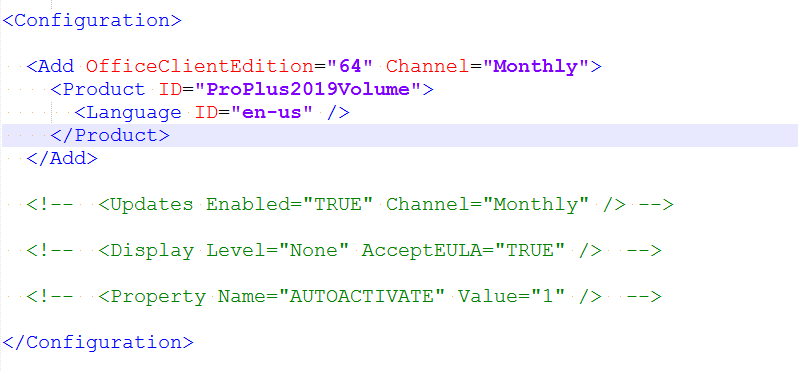
Save the file and run 'setup.exe /download configuration-Office365-x64.xml'.
This will run in the background and download into a subfolder - Office.
Now you have the files you can make configurations using these resources
https://config.office.com/ - Spits out config files for Office 365 - At time of writing it isn't made for 2019 yet but should work ok.
https://docs.microsoft.com/en-gb/DeployOffice/office2019/deploy - Documentation on customising the confiuration files.
If you want a head start I've made config files for Office, Project and Visio - Download
Example - Office 32-Bit, exclude OneDrive and Skype, accept EULA, Silent install, some customisations from Config.office.com

Test
To test your config files run setup.exe with the configure switch
setup.exe /configure configuration-OfficeProPlus-x86.xml
Deploy
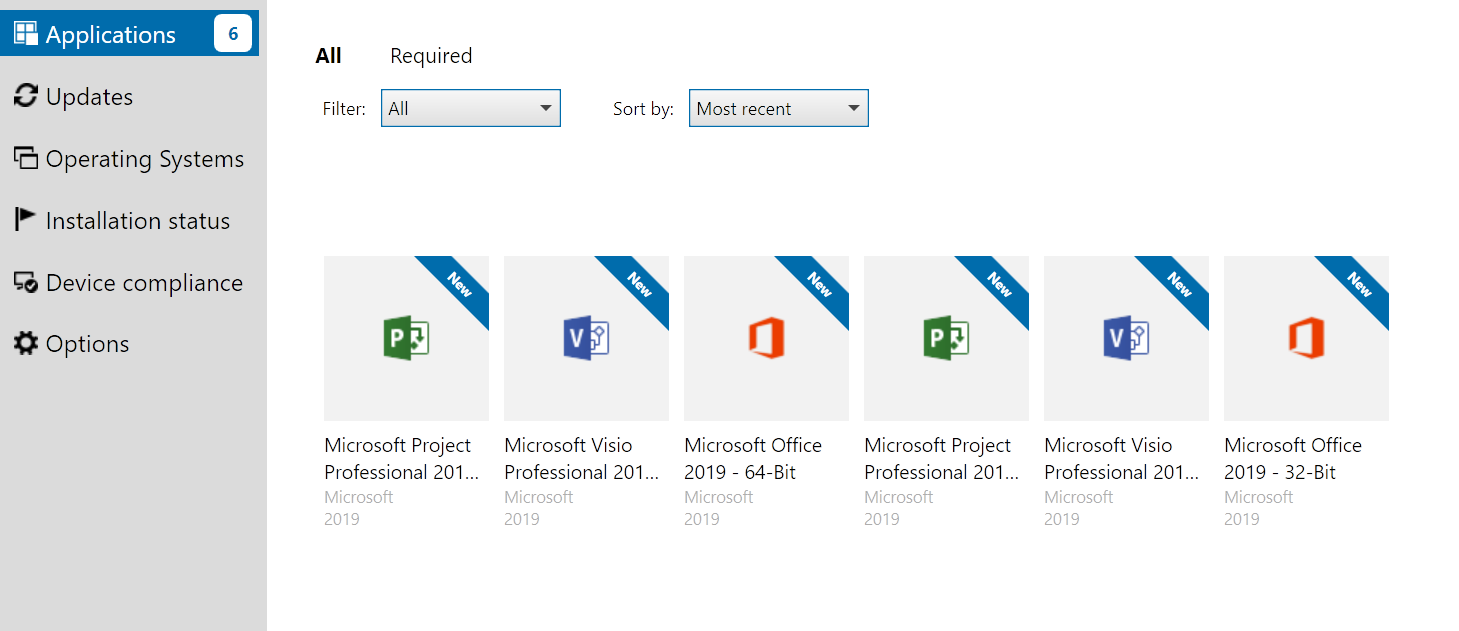
Create an application in SCCM - with your files.
Deployment type - Script Installer
For Detection Methods:
Office - 32-Bit: %ProgramFiles(x86)%\Microsoft Office\root\Office16\Winword.exe
Office - 64-Bit: %ProgramFiles%\Microsoft Office\root\Office16\WINWORD.EXE
Project - 32-Bit: %programfiles(x86)%\Microsoft Office\root\Office16\WINPROJ.EXE
Project - 64-Bit: %ProgramFiles%\Microsoft Office\root\Office16\WINPROJ.EXE
Visio - - 32-Bit: %programfiles(x86)%\Microsoft Office\root\Office16\VISIO.EXE
Project - 64-Bit: %ProgramFiles%\Microsoft Office\root\Office16\VISIO.EXE
KMS
Download the Volume license app http://www.microsoft.com/downloads/details.aspx?FamilyID=878fef7e-3f4d-4d22-a423-f447c0f5bfdd
On the KMS server run the exe.
Follow the Wizard Prompts
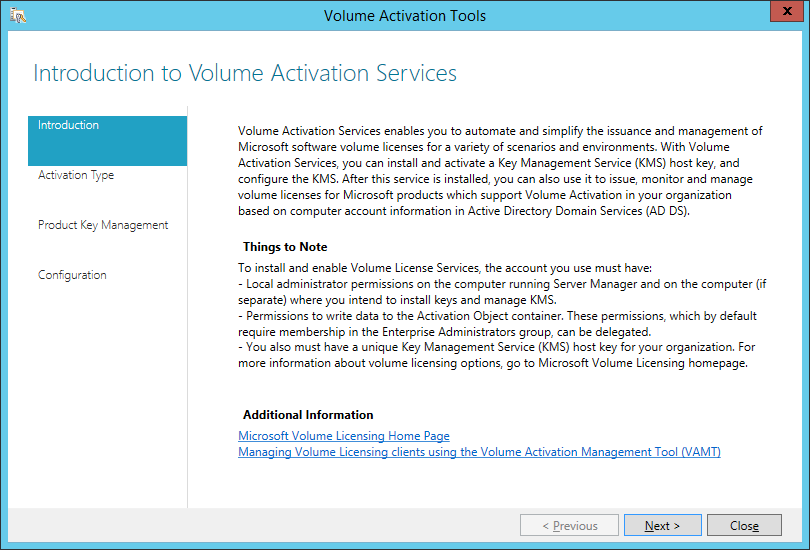
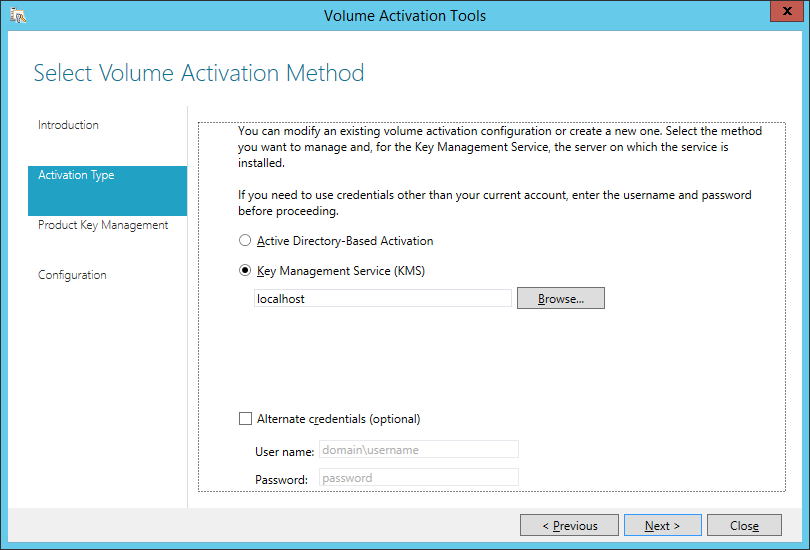
Get your Office 2019 KMS Key from your Key Holder
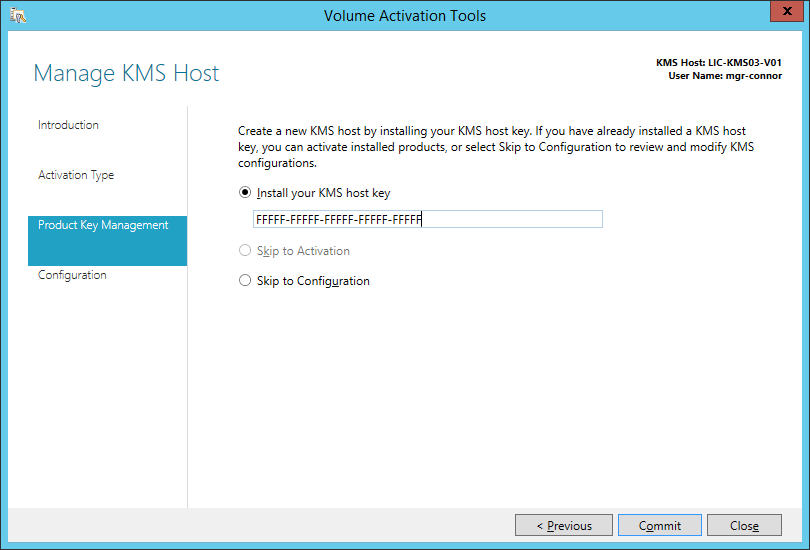
Don't Click Commit! Click Cancel as you already have this configured


MDT Toolkit files fail to download - could not resolve source

If this happens during OSD, it is likely due to 2 settings in the BIOS.
I recommend
WIN7 -
Boot mode: Legacy
Sata mode: AHCI
Win10-
Boot mode: UEFI
Sata mode: AHCI
From the log:
The task sequence execution engine failed executing the action (Use Toolkit Package) in the group (Initialization) with the error code 2147942561
Action output: ... ursiveCreatePath(sPath.substr(0, nPos), psa), HRESULT=800700a1 (e:\nts_sccm_release\sms\framework\core\ccmcore\path.cpp,104)
RecursiveCreatePath(sPath.substr(0, nPos), psa), HRESULT=800700a1 (e:\nts_sccm_release\sms\framework\core\ccmcore\path.cpp,104)
RecursiveCreatePath( sNormalizedPath, psa ), HRESULT=800700a1 (e:\nts_sccm_release\sms\framework\core\ccmcore\path.cpp,159)
DownloadContentLocally (pszSource, sSourceDirectory, dwFlags, hUserToken, mapNetworkAccess), HRESULT=800700a1 (e:\nts_sccm_release\sms\framework\tscore\resolvesource.cpp,3582)
TS::Utility::ResolveSource (pszPkgID, sPath, 0, hUserToken, mapNetworkAccess), HRESULT=800700a1 (e:\nts_sccm_release\sms\client\osdeployment\installsoftware\runcommandline.cpp,399)
cmd.Execute(pszPkgID,sProgramName, dwCmdLineExitCode), HRESULT=800700a1 (e:\nts_sccm_release\sms\client\osdeployment\installsoftware\main.cpp,372)
Failed to resolve the source for SMS PKGID=PS10098B, hr=0x800700a1
Install Software failed to run command line, hr=0x800700a1. The operating system reported error 2147942561: The specified path is invalid.
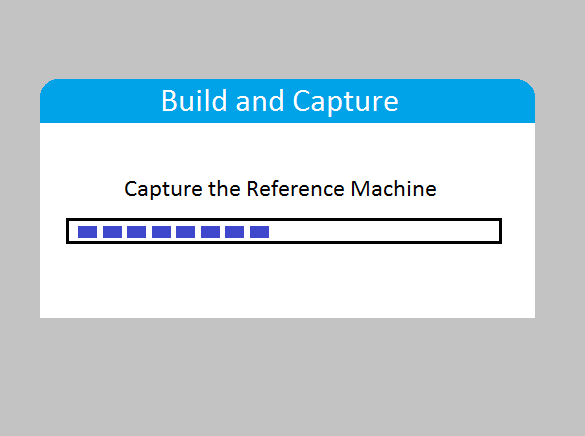
Build and Capture fails if KB3160005 IE sec cumulative update is installed
Update: Adding more scratch space to the boot wim seems to have resolved the problem on Windows 10, Windows 7 seems to still have issues.
Update: This update is also in Windows 10 CU 3163018, causing the same error. No workaround yet
If your build and capture is failing at the capture step make sure you don't have the cumulative Security Update for IE11 KB3160005. It's somehow stopping the registry load part of the step.
|
1 2 3 4 5 6 7 8 9 10 11 12 |
The task sequence execution engine failed executing the action (Capture the Reference Machine) in the group (Capture the Reference Machine) with the error code 2147943850 Action output: ... software" into HKLM\OfflineRegistry1 RegLoadKey( oRegKeyHKLM, sRegKey, sRegHivPath), HRESULT=800705aa (e:\qfe\nts\sms\framework\osdcore\offlineregistry.cpp,68) LoadHive( szPathBuffer, m_sRegKeySoftware, m_oRegKeySoftware ), HRESULT=800705aa (e:\qfe\nts\sms\framework\osdcore\offlineregistry.cpp,190) m_oOfflineRegistry.Init(pszSystemRoot), HRESULT=800705aa (e:\qfe\nts\sms\framework\osdcore\offlineos.cpp,737) rDefaultOs.initialize(sTargetSystemRoot), HRESULT=800705aa (e:\nts_sccm_release\sms\client\osdeployment\capturesystemimage\capturesystemimage.cpp,613) VerifySystemForCapture(DefaultOs), HRESULT=800705aa (e:\nts_sccm_release\sms\client\osdeployment\capturesystemimage\capturesystemimage.cpp,859) Finished with error code 0x800705AA Failed to load "C:\WINDOWS\system32\config\software" (0x800705aa). Failed to load the offline SOFTWARE registry (0x800705aa). Failed to validate for capture. nsufficient system resources exist to complete the requested service. (Error: 800705AA; Source: Windows). The operating system reported error 2147943850: Insufficient system resources exist to complete the requested service. |

Hey Cortana! How do I add additional speeches during OSD so you work?

For Cortana to work with your language you need to install the appropriate speech pack however if you are connected to an enterprise WSUS you won't be able to see additional downloads for your language.
To work around this you can get the language cab files from the 'Windows 10 Features on Demand' iso available via volume license and MSDN downloads, then use dism commands to apply the desired language packages. Currently the available ones are
- German - Germany (Microsoft-Windows-LanguageFeatures-Speech-de-de-Package.cab)
- English - Australia (Microsoft-Windows-LanguageFeatures-Speech-en-au-Package.cab)
- English - Canada (Microsoft-Windows-LanguageFeatures-Speech-en-ca-Package.cab)
- English - United Kigndom (Microsoft-Windows-LanguageFeatures-Speech-en-gb-Package.cab)
- English - India (Microsoft-Windows-LanguageFeatures-Speech-en-in-Package.cab)
- English - United States (Microsoft-Windows-LanguageFeatures-Speech-en-us-Package.cab)
- Spanish - Spain (Microsoft-Windows-LanguageFeatures-Speech-es-es-Package.cab)
- French - France (Microsoft-Windows-LanguageFeatures-Speech-fr-fr-Package.cab)
- Italian - Italy (Microsoft-Windows-LanguageFeatures-Speech-it-it-Package.cab)
- Japanese - Japan (Microsoft-Windows-LanguageFeatures-Speech-ja-jp-Package.cab)
- Chinese - China (Microsoft-Windows-LanguageFeatures-Speech-zh-cn-Package.cab)
- Chinese - Hong Kong (Microsoft-Windows-LanguageFeatures-Speech-zh-hk-Package.cab)
- Chinese - Taiwan (Microsoft-Windows-LanguageFeatures-Speech-zh-tw-Package.cab)
Note: Cortana is currently only available in United States, Japan, Australia, and Canada and India (in English) however having the speech packs installed will help your deployment if other markets open up.
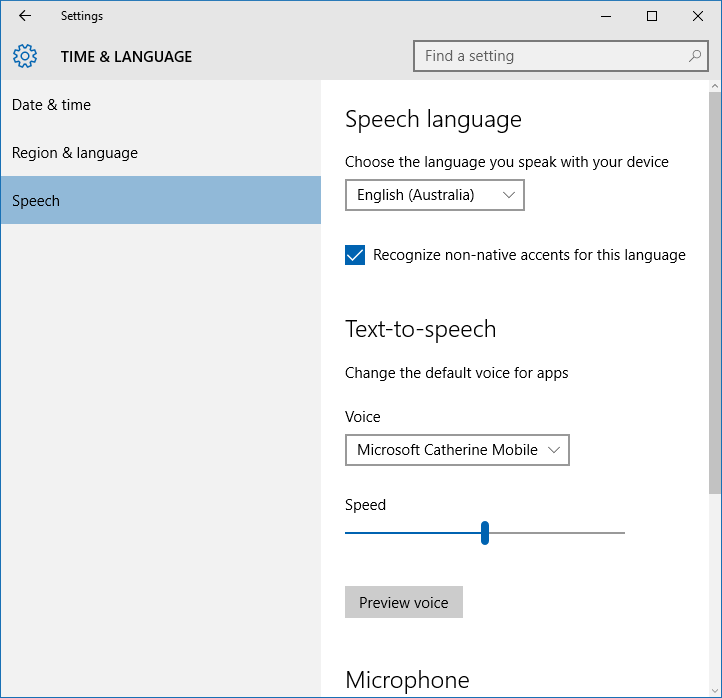
You can also install the Text to speech pack along side. For example
Microsoft-Windows-LanguageFeatures-TextToSpeech-en-au-Package.cab adds Aussie Catherine and British James however Cortana doesn't use them.
To deploy during OSD create a package with the desired speech packs and an Install.bat file. The following example of install.bat sets up English-Australia and also adds text to speech voices, you can add additional packages by changing the PackagePath:
DISM /Online /Add-Package /PackagePath:Microsoft-Windows-LanguageFeatures-TextToSpeech-en-au-Package.cab
DISM /Online /Add-Package /PackagePath:Microsoft-Windows-LanguageFeatures-Speech-en-au-Package.cab
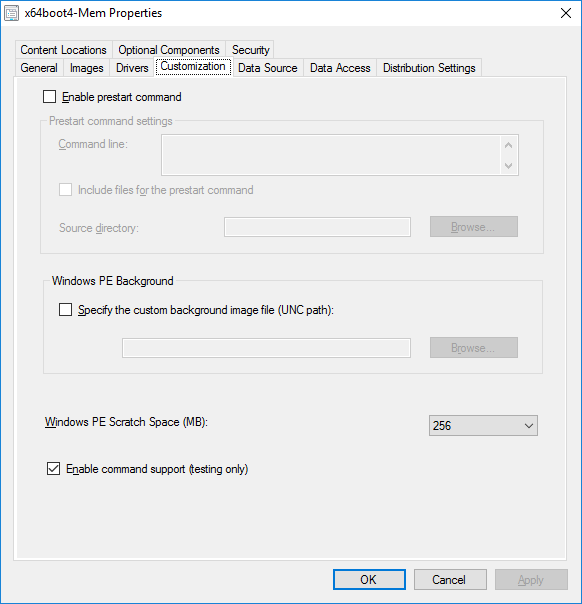
And then create a Run Command Line step in the task sequence referencing the package with Disable 64-bit file system redirection

install.bat
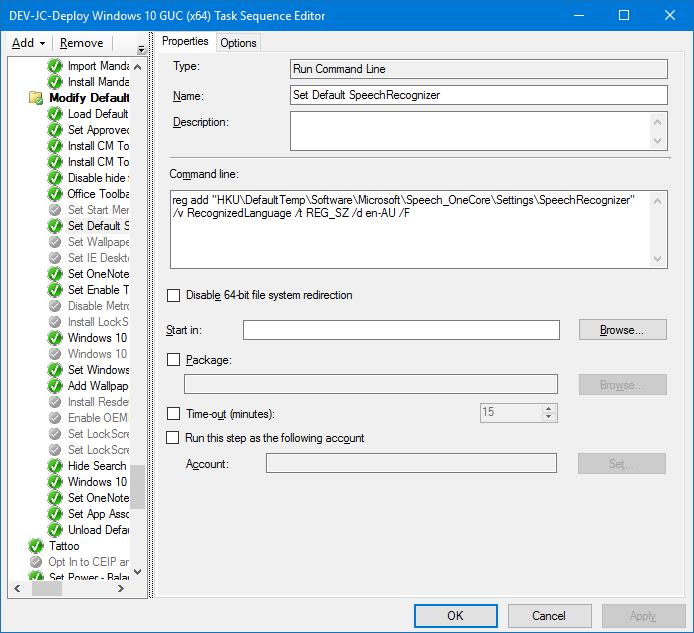
To set the default Speech Language you need to modify the default user reg. This can be achieved in 3 commands during the task sequence
Load Default User Registry
reg load HKU\DefaultTemp "C:\Users\Default\NTUSER.DAT"
Set Default SpeechRecognizer
reg add "HKU\DefaultTemp\Software\Microsoft\Speech_OneCore\Settings\SpeechRecognizer" /v RecognizedLanguage /t REG_SZ /d en-AU /F
Unload Default User Registry
reg unload HKU\DefaultTemp
Creating Collections to deploy ConfigMgr client updates (the easy way)
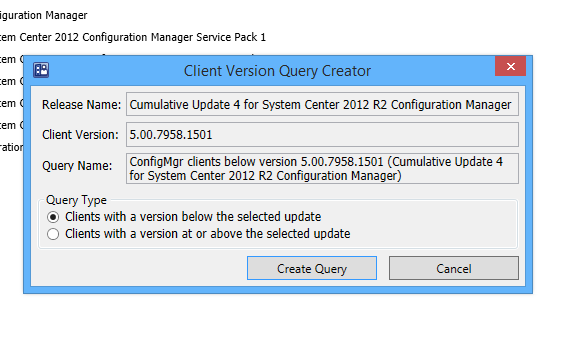
Get the Servicing Exstension from Microsoft NOW as it does all the work!!! http://blogs.technet.com/b/configmgrteam/archive/2014/12/09/now-available-microsoft-system-center-2012-configuration-manager-servicing-extension.aspx
Once you have this, in the Admin node, there's a site servicing section -> client targeting. You click 'Create Query' and it makes a nice query for your collections.

Then you go about creating your collection.
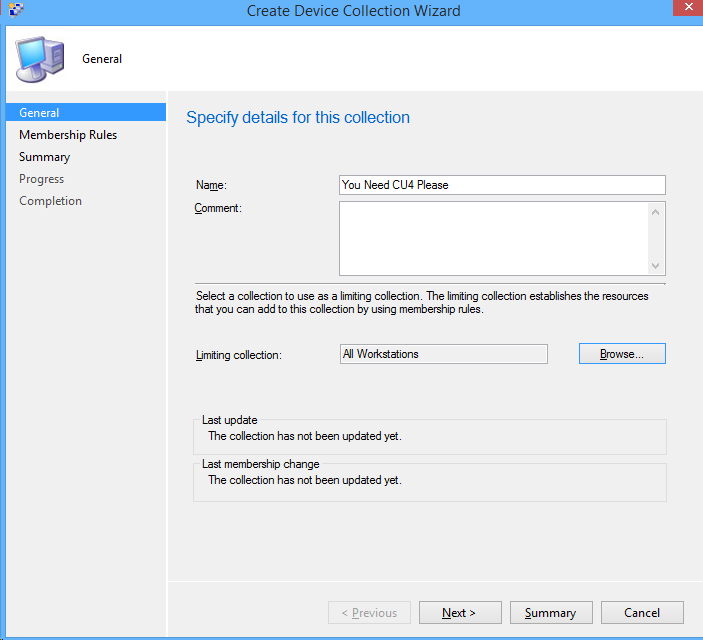
click next. Select Add Rule -> Query Rule
Click Import Query Statement and choose the nice query microsoft made for you.
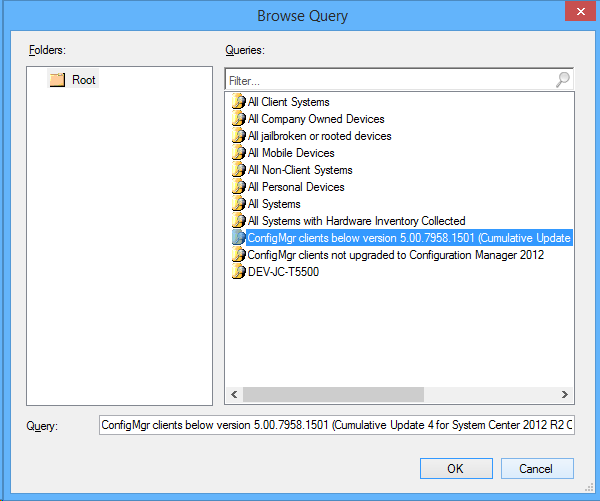
Deploy the cumulative update to the clients.

Create a compliance baseline to remove a folder

In this example we are killing the Silverlight start menu folder enabling us to use the Windows Updates while keeping the start menu clean.
Create the Configuration Item
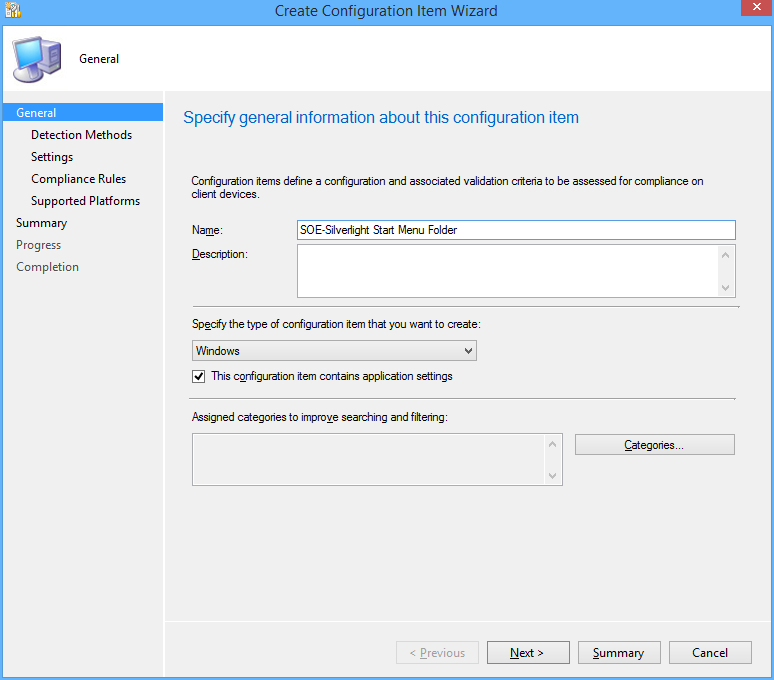
1. In the console click Create Configuration Item
2. Name your configuration item, click 'This configuration item contains application settings' and click Next
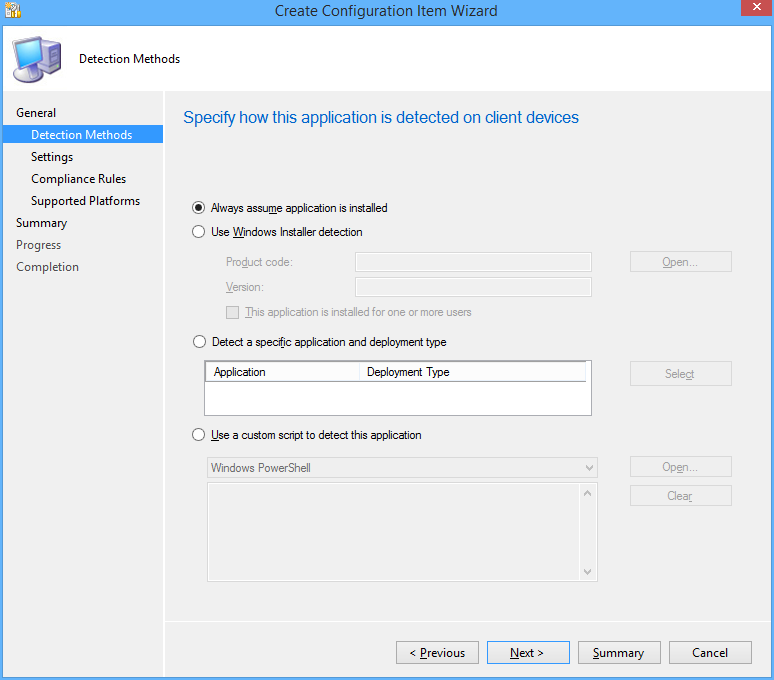
3. Select 'Always assume application is installed' and click Next
4. Click New, Change the Setting type to 'Script'. Change the Data type to 'String'. Also name your Setting.
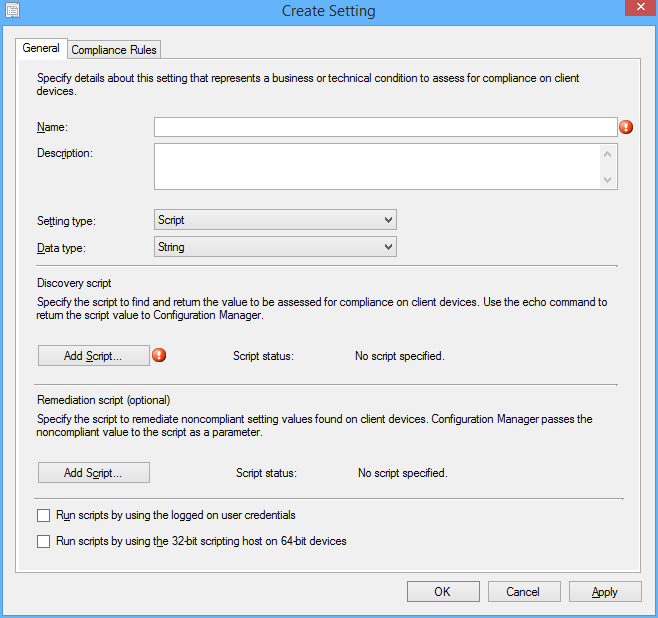
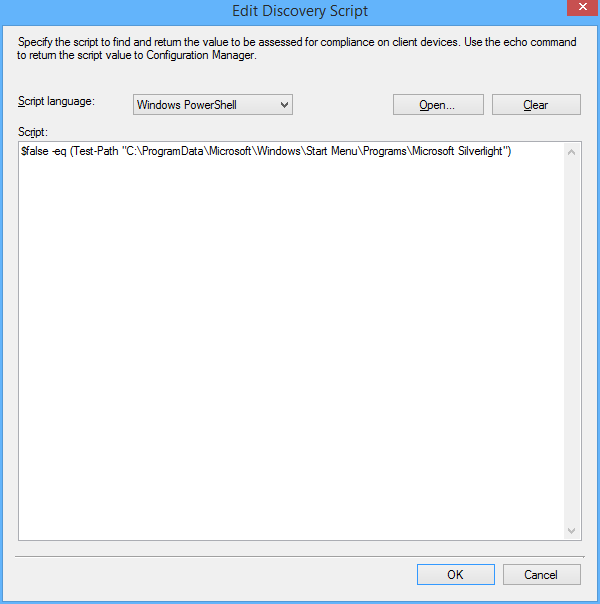
5. Under Discovery Script click 'Add Script'
6. Ensure Script language is 'Windows Powershell' and paste the following
$false -eq (Test-Path "C:ProgramDataMicrosoftWindowsStart MenuProgramsMicrosoft Silverlight")
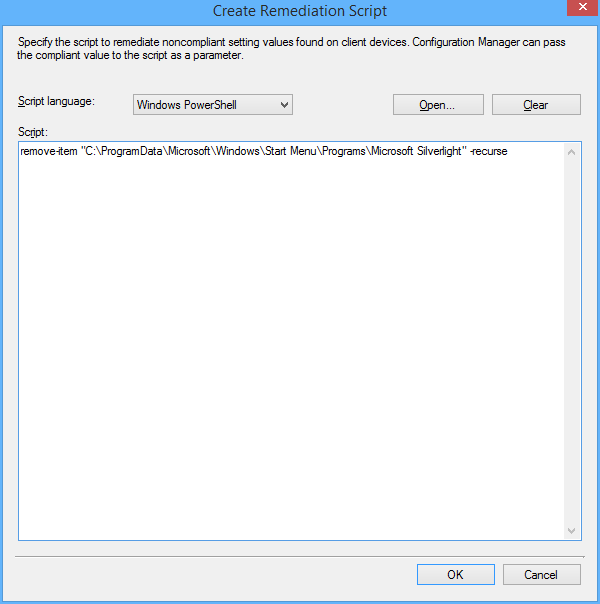
7. Under Remediation Script click 'Add Script'
8. Ensure Script language is 'Windows Powershell' and paste the following
remove-item "C:ProgramDataMicrosoftWindowsStart MenuProgramsMicrosoft Silverlight" -recurse
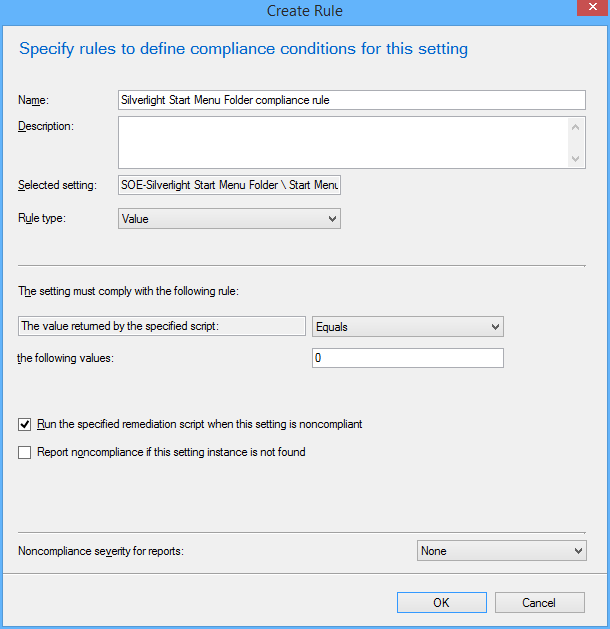
9. Click 'Ok', then click the 'Compliance Rules' tab
10. Click 'New'
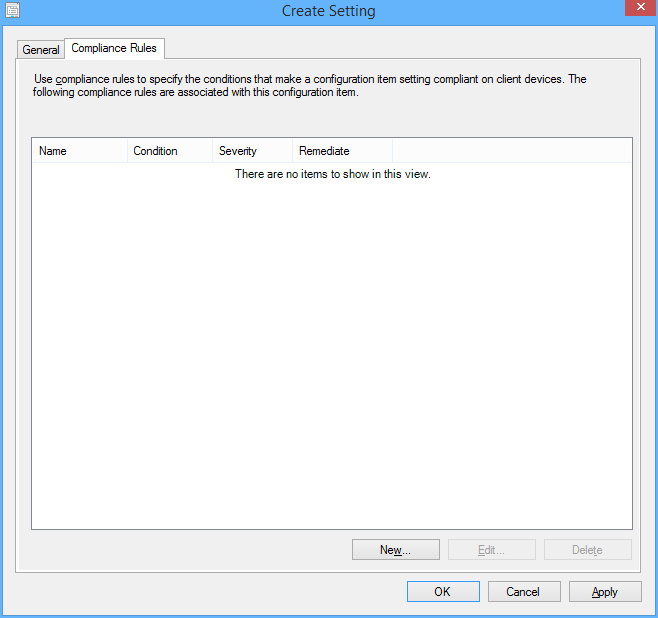
11. Configure the Compliance rule: Set 'Rule type' to Value. Set the Value returned to equal 0. Click 'Run the specified remediation script when this setting is non complaint'.
12. Click 'OK' then 'Next', 'Next' on the Wizard Screen.
13. Choose the OS Environments for compliance
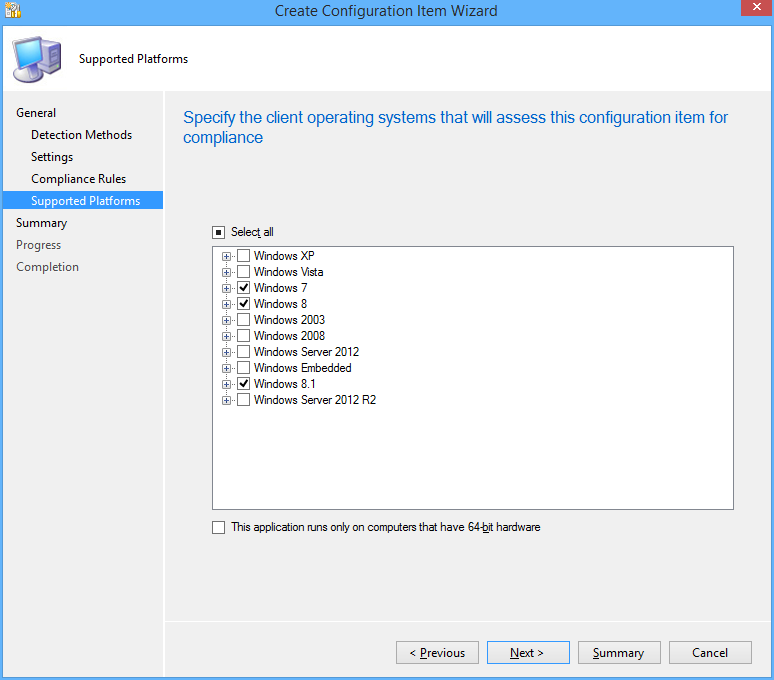
14. Click 'Next' until you finish the Wizard.
15. Under Configuration Baselines click 'Create Configuration Baseline' and add the configuration item we just created, then click 'OK'
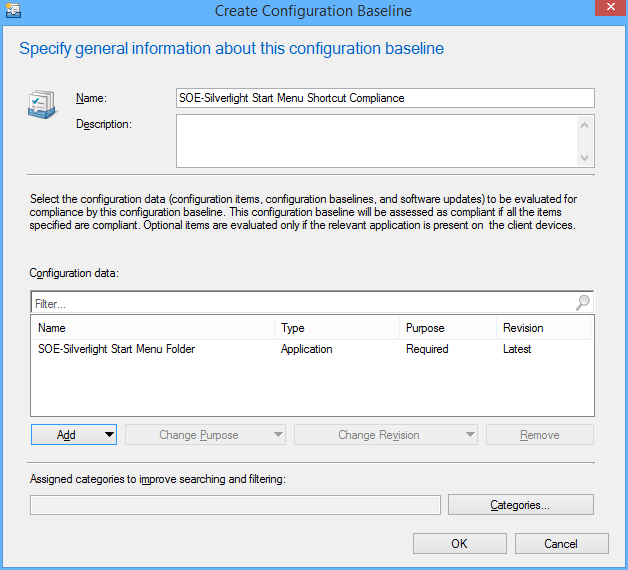
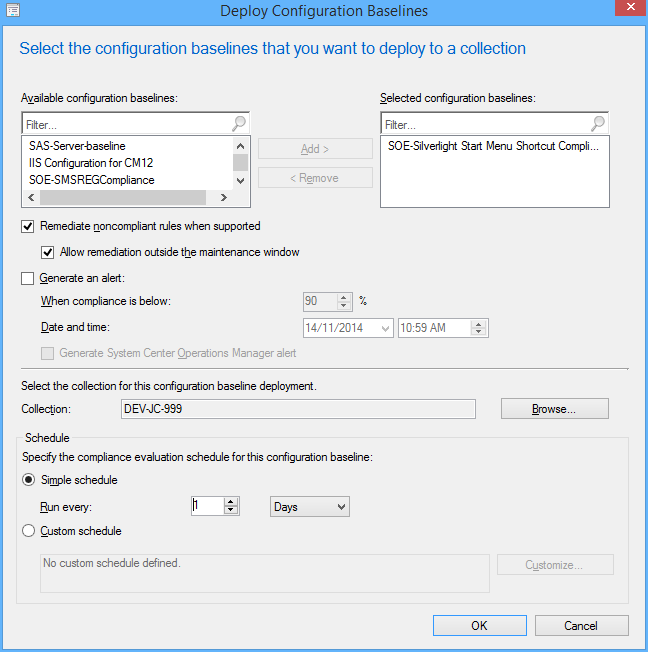
16. The Baseline is now ready to be deployed to your test collection!
Right click and select Deploy, Enable the remediation options and change the Schedule if needed.
17. On your test machine, request a new machine policy, then click on the Components tab. Clicking Refresh should show the new baseline which you can then evaluate.
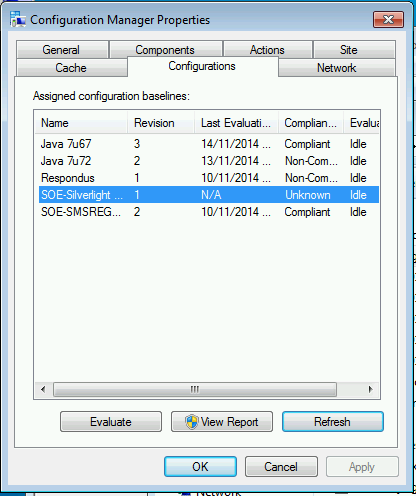
18. Within a minute the remediation runs and the folder disappears!

Optimize the 'build and capture' time and size (SCCM Build)
Inspired by Johan's post http://www.deploymentresearch.com/Research/tabid/62/EntryId/174/Building-reference-images-like-a-boss.aspx
I am probably one of the few that uses SCCM to capture base images. I use it because I create a thick image and it keeps the history of packages that it has installed meaning that newly imaged machines will know that they have already installed software x when they recieve it's required deployment.
Patch the install.wim
Patching the default Windows 7 install.wim so it doesn't need to install as many updates during OSD.
1. Download WSUS Offline Update from http://download.wsusoffline.net/
2. Extract to C:wsusoffline and run UpdateGenerator.exe
3. Choose Windows 7 x64 Global and click start.
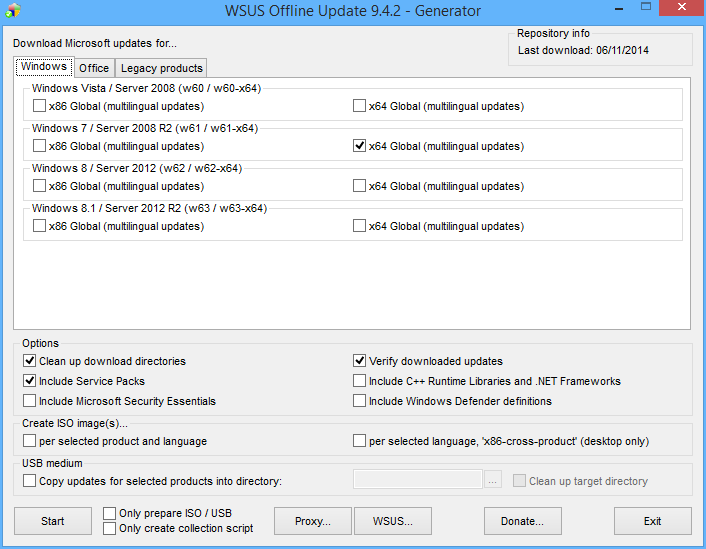
4. Important: Delete KB2506143, KB2533552 and KB2819745 from C:wsusofflineclientw61-x64glb if they exist. They break the wim. If your company hasn't deployed IE11 also delete patches for it.
5. Extract a Win7 SP1 Enterprise ISO to 'C:OS Windows 7 SP1 x64'
6. Create the dir C:mount
7. Mount the wim -
dism /mount-wim /wimfile:"C:OS Windows 7 SP1 x64sourcesinstall.wim" /mountdir:C:mount /index:1
8. Patch the wim -
dism /image:C:mount /Add-Package /PackagePath:C:wsusofflineclientw61-x64glb
9. Commit/Close the wim -
dism /unmount-wim /mountdir:C:mount /commit
10. Copy the 'OS Windows 7 SP1 x64' folder to an unc share and import into SCCM under Operating System Installers.
Use Mikael Nystrom's Cleanup Script
1. Download via http://deploymentbunny.com/2014/06/05/nice-to-know-get-rid-of-all-junk-before-sysprep-and-capture-when-creating-a-reference-image-in-mdt/
2. Place in a UNC Share.
3. Copy ZTIUtility.vbs from MDT 2013 to the UNC Share.
4. Modify Action-CleanupBeforeSysprep.wsf second line to reference the ZTIUtility.vbs in the same folder
<script language="VBScript" src="ZTIUtility.vbs"/>
5. Create a package in SCCM.
6. Before the capture steps create a run command step surrounded by 2 reboots:
cscript.exe Action-CleanupBeforeSysprep.wsf using the package created and disable 64-bit file system redirection

The updated wim will have the patches required for this step.
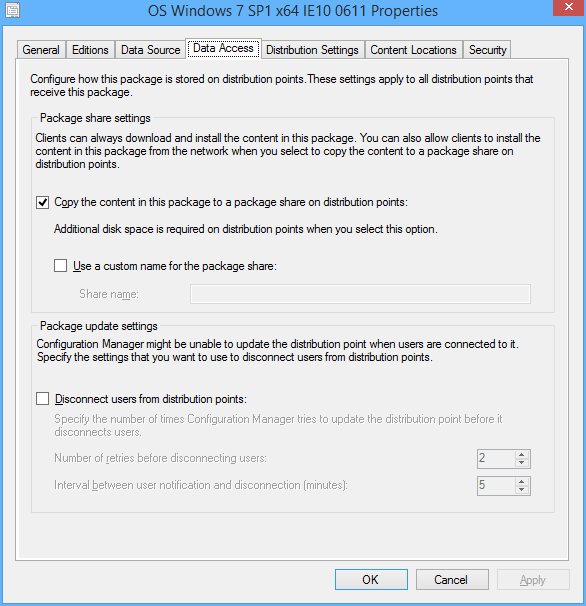
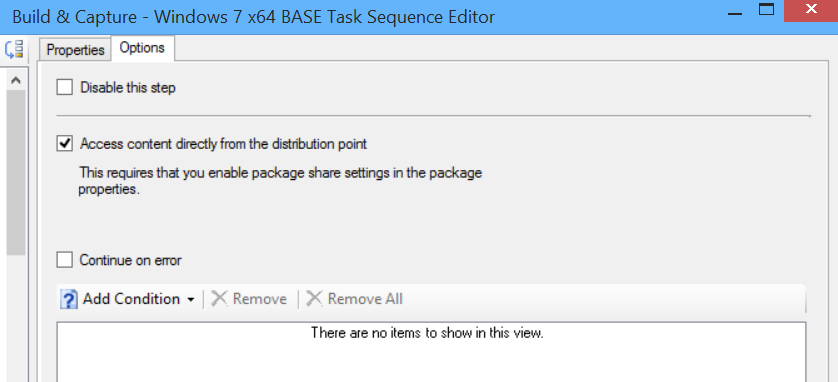
Access the wim directly from the distribution point
For this to work you need to tick the checkbox on the OS Installer properties to copy to a share, then also the Access content directly in the task sequence Apply OS step.
Monitor KB2894518 for mutiple reboot updates
http://support.microsoft.com/kb/2894518
Create a separate deployment for these updates to a collection that excludes your capture VMs
Tweak your Virtual Machine
- Don't use the Legacy Network adapter (Have had issues at capture stage)
Visit http://www.deploymentresearch.com/Research/tabid/62/EntryId/174/Building-reference-images-like-a-boss.aspx for VM tweaks
- Use 2 vCPUs
- Use a RAM Disk
Fix for customized Adobe CC Acrobat in base image not activated
If you put Adobe Acrobat in the base image using the steps from http://helpx.adobe.com/creative-cloud/packager/deploying-acrobat.html
Install Customization Wizard XI msi + mst then Install CC package msi and mst you may find it not activated.
To fix this during the OS Deployment add a run command line step to reinstall the CC package mst and mst.
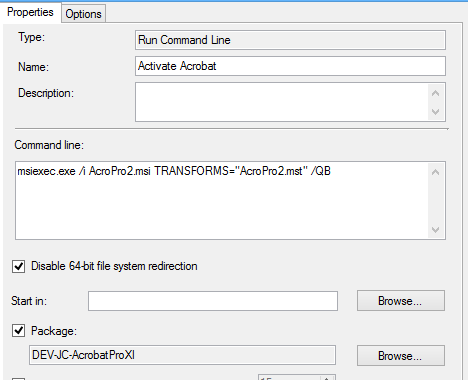
A normal install program step fails....
KB: PXE boots using the wrong wim file.
If you happen to change the source name of a boot wim the pxe point may boot using the old file. To fix rename
<Drive Letter>RemoteInstallSMSImages<WIMPkgID>oldbootname.wim to oldbootname.wim.old
Next PXE boot it will then use the new boot.wim file.
Application Catalog logs
There are 2 operational logs for the App Catalog server side.
- <Drive Letter>SMS_CCMCMApplicationCatalogLogsServicePortalWebSite.log
- <Drive Letter>SMS_CCMCMApplicationCatalogSvcLogsServicePortalWebService.log
Troubleshooting
If the App catalog has an error message "Cannot Connect to the Application Server" this is referring the to the ServicePortalWebService.log.
So far I have only seen the error:
error: WriteHeadersCallback(WebExceptionStatus errorStatus, ConnectStream stream, Boolean async)
in the log ServicePortalWebSite.log
restarting the IIS service resolved this.